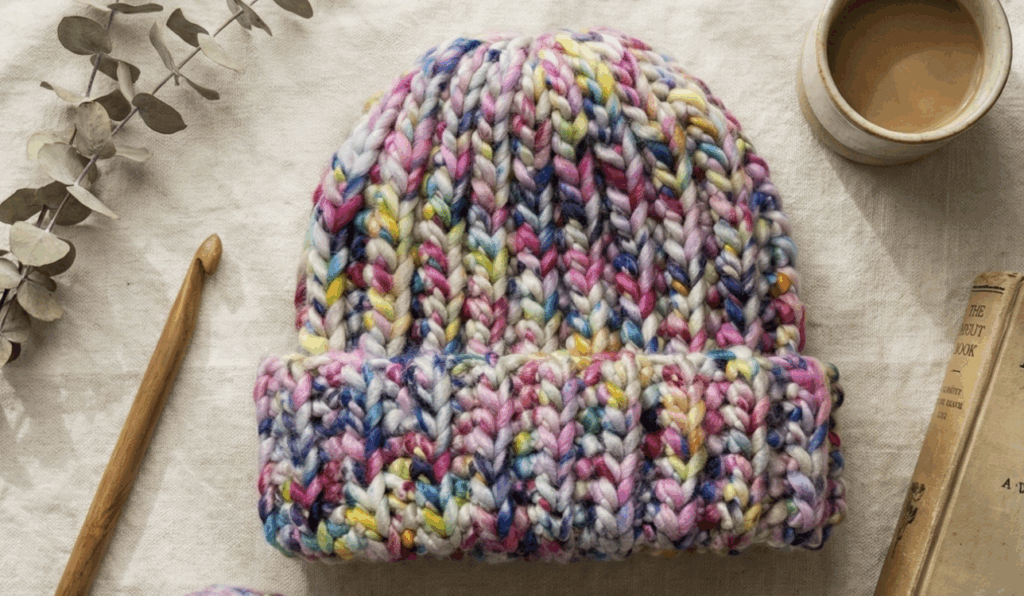
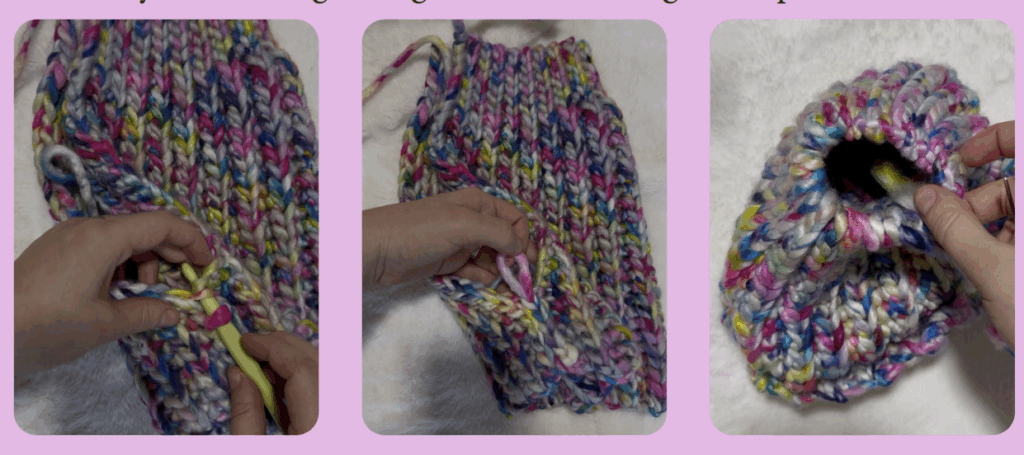
This easy-to-follow pattern is designed to help you create a cozy, stylish beanie in no time. The beanie is made by crocheting one single flat piece, using a crochet knitt stitch that imitates knitting. Once the piece reaches the desired head circumference, the sides are joined together, and the top is closed to form the beanie.
This pattern does not use a classic gauge. It is designed to be measured and adjusted to fit your own head size. Some standard measurments are:
For children’s sizes: 23–25 chains
For adult sizes: 27–30 chains
Work as many rows as needed until the piece comfortably fits around your head circumference.
Note: It’ s very important to use yarn of the same thickness to get consistent results. Using thinner yarn may require making a longer chain and more rows to achieve the desired size.
Special stitches
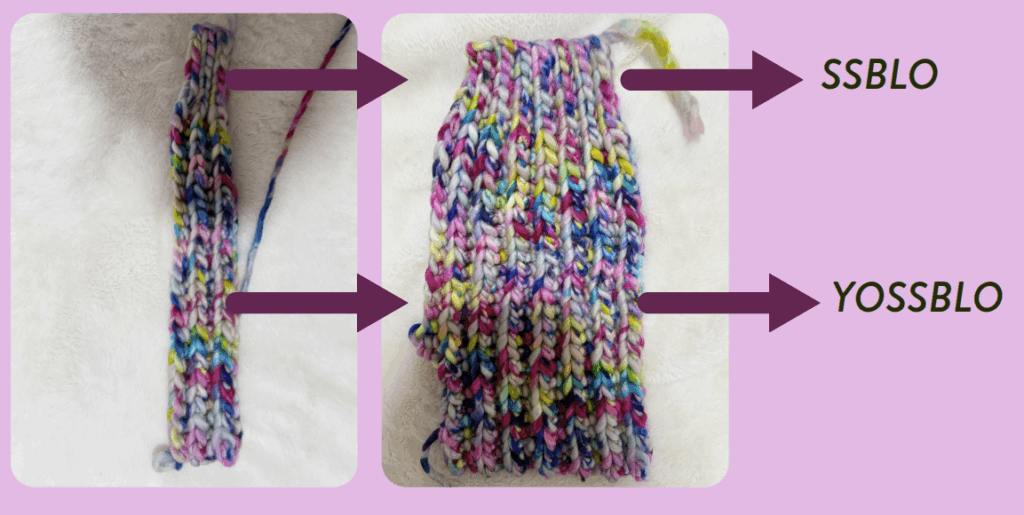
Slip Stitch Back Loop Only – SSBLO
Insert hook in the back loop of the stitch and make a slip stitch.
Yarn Over Slip Stitch Back Loop Only –YOSSBLO
Yarn over, insert hook into the back loop of the next stitch and pull the yarn through both loop on the hook in one motion.
Important videos
YOSSBLO /SSBLO stitches
Watch the following video for the YOSSBLO /SSBLO stitches
Joining process
The video below shows the joining process.
Beanie construction
The video below shows the joining process.
Head Circumference & Row Guide
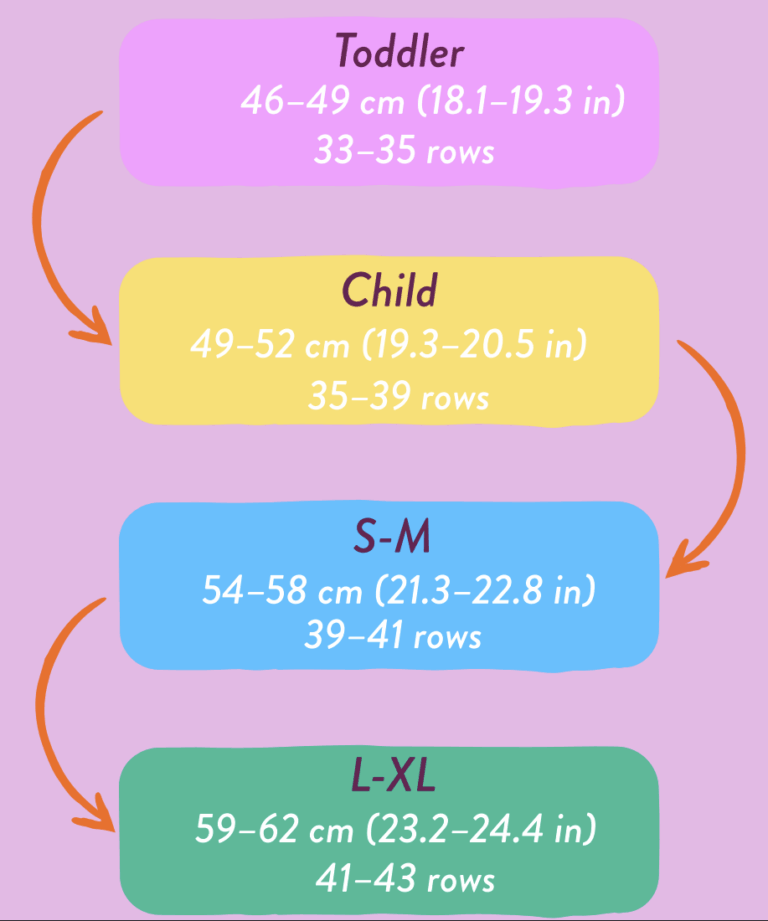
This pattern is stretchy and adjustable, so the number of rows may vary depending on yarn, hook size, and personal tension. The row counts below are approximate and meant as a guideline only. Always measure around the head for the best fit.
This row count refers to the rows worked before joining. It is best to finish with an odd number of rows, so that the joining row is an even-numbered row.
Instructions
Foundation:
Ch 31, turn
Start working in the second-to-last chain from the hook.
Row 1:
YOSSBLO 24x, SSBLO 6x, Ch 1, turn → 30 stc
Row 2:
SSBLO 6x, YOSSBLO 24x, Ch 1, turn → 30 stc
Repeat rows 1-2 alternately until the piece fits around your head.
For size S-M, I worked 41 rows in total.
Joining the sides using slip stitch
Always join the piece on an even-numbered row so that you end up at the top edge. This way, you won’t need to cut the yarn before closing the top.
Make sure your working yarn comes from the bottom side.
Do not cut the yarn; simply continue working.
Pull your working loop through the first stc on the opposite side
Go back to the first side, insert the hook into the first back loop only (BLO) of the first side, then into the first front loop only (FLO) of the opposite side.
You will have three loops on the hook. Make a slip stitch by pulling the yarn through all three loops.
Repeat until the end.
Cut the yarn, leaving a longer tail for closing the top of the beanie.
Closing the Top
Using a regular yarn needle, thread the yarn through each stitch at the top.
Pull the yarn tightly to close the top.
Weave the remaining yarn inside to secure the ends.
Optional: Add a pom-pom or use a ready-made one as a cute finishing touch.
Your Candy Beanie Is Done 🍬
Thank you
Thank you so much for downloading my free crochet pattern! I truly hope you enjoy bringing it to life with your own hook and yarn.
Happy crocheting! 🧶
Tag me on social media
If you decide to share your finished project on social media, I’d really appreciate it if you tag me as the designer @cickadesign. Instagram @cickadesign TikTok @cickadesign
Copyrights
This pattern is free and intended for personal use only. You may not copy, reproduce, distribute, or sell the pattern itself in any form, whether digital or physical. However, you are welcome to sell any finished items you create using this pattern.
Questions
If you have any questions about this pattern, feel free to message me on Instagram or send an email to [email protected].
Five Days I’ll Never Forget: My Creative Crochet Retreat Experience in Sicily Five Days I’ll Never Forget: My Creative Crochet Retreat Experience in Sicily Some trips truly change you—not because of the places you visit, but because of the people you meet. That is exactly what the Creative Crochet Retreat in Sicily was for me.It was five days packed with crocheting, learning,…
A Summer Full of Crochet A Summer Full of Crochet I always find it a little strange when summer starts coming to an end. It feels like it has only just started, and then suddenly it is September and I am looking back at everything that happened over the past few months.This summer was a…